
Create a contact form with React, AWS and Terraform, and pay 0$ for everything: Part 1
One fine day I have decided to have a contact form for one of my Jamstack-based websites. The goal was to have two simple fields and a button. Upon submitting the form I was supposed to receive an email.
Since the project was non-profitable, the aim was to do everything in the cheapest way possible. Ideally, free of charge.
- Probably it could be wiser to use a No-Code tool, like many people do. But the end solution would definitely loose in flexibility, and besides, I am an engineer, I code because I can! 💪
- Since I don't have any SMTP server laying around just like that, to send mail I needed to find a provider. Google SMTP was off the table due to its complexity. I wanted something simpler.
Among tons of really good services I picked one called
Sendinblue. They had a more than generous free tariff to offer: up to 300 free emails a day. Well, just because I am not a rockstar, there is no reason to expect 1k fan letters per a day, so Sendinblue was a go for me. - Of course I could not call the provider endpoint directly from the browser, due to the obvious security reasons. I had to make a proxy endpoint.
Eventually I chose
AWS Lambda, hosting everything in the cloud. The reasons behind the decision:- I was not expecting heavy traffic, so Lambda would remain dormant most of the time, unlike EC2.
- I could have, however, deployed a docker image to Heroku. But a free container sleeps after N minutes of inactivity too, and it takes quite significant amount of time to wake it up. There would be noticeable latency when submitting the form.
- Amazon offers amazing 12-months free tier for Serverless.
- I never do manual infrastructure setup through the UI of a cloud provider. I believe that infrastructure-as-code is the right way to do the job.
I was using the
Serverlessframework to deploy my lambdas before. Today I try making everything withTerraform- the leading tool for the infrastructure maintenance. - Choosing
Reactfor the UI part was obvious, because the website was already in React.
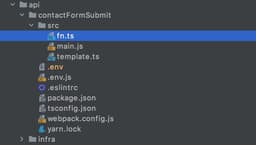
The website was based on Gatsby, so I've put everything into the api/ folder, like this:
The lambda itself is fairly simple. It just calls the Sendinblue API having the API_KEY provided. Sendinblue also has an official SDK, which I found to be quite over-engineered and impractical to use, since I only needed to make one POST call.
Ah, how I like good old Axios. Axios, you helped me out so many times!
import axios from 'axios';import { compile } from 'pug';import { template } from './template';const composeMessage = compile(template);export const fn = async (message: string, contact: string) => {const htmlContent = composeMessage({message,contact,});return axios.post('https://api.sendinblue.com/v3/smtp/email',{sender: {name: '🤖 Mr. Robot',email: 'mrrobot@mywebsite.ru',},to: [{// replace this with your own dataemail: 'my.email@gmail.com',// and that one tooname: 'My name',},],subject: 'New message from MyWebsite!',htmlContent,},{headers: {'Content-Type': 'application/json',Accept: 'application/json','api-key': process.env.SENDIN_BLUE_API,},},);};``
The templating was powered by Pug, so I didn't have to worry about manual escaping and anything.
export const template = `htmlbodyh1 New message from MyWebsite!h2 The message:p #{message}if contacth3 How to contact the author:p #{contact}`;
The handler for the lambda was located in a separate file. This way I could run the function itself locally, if required.
import { fn } from './fn';const makeResponse = (code, message = 'Ok') => {if (code === 400) {message = 'Go away hacker';} else if (code === 500) {message = 'Oooops';}return {statusCode: code,headers: {'Content-Type': 'text/html; charset=utf-8','Access-Control-Allow-Origin': process.env.CORS,},body: message,};};export const handler = (event, context, callback) => {const { body: rawBody } = event;let body = {};try {body = JSON.parse(rawBody);} catch (error) {return callback(null, makeResponse(400));}const { contact, message } = body;fn(message, contact).then(() => {callback(null, makeResponse(200));}).catch((error) => {console.error(error);callback(null, makeResponse(500));});return true;};
I typically build everything with Webpack. One day I might have to learn other bundlers, but I am just such an old timer.
Normally I inject the environment variables with the Dotenv plugin. But because setting systemvars to true during the production build is sort of creepy, I invented nothing better than just using the Define plugin instead. After all, create-react-app does so, why should not I?
const path = require('path');const Dotenv = require('dotenv-webpack');const { DefinePlugin } = require('webpack');const allowedEnvVariables = ['SENDIN_BLUE_API', 'CORS'];const getEnv = () => {const result = [];allowedEnvVariables.forEach((variableName) => {if (variableName in process.env &&process.env[variableName] !== undefined) {result[`process.env.${variableName}`] ='"' + process.env[variableName] + '"';}});return result;};module.exports = {mode: 'production',entry: './src/main.js',output: {filename: './main.js',path: path.resolve(__dirname, 'build'),libraryTarget: 'umd',},resolve: {extensions: ['.ts', '.js'],},target: 'node',module: {rules: [{test: /\.ts$/,loader: 'ts-loader',exclude: /node_modules/,},],},plugins: [new Dotenv(), new DefinePlugin(getEnv())],};
You may be also interested in the package.json, just in case.
{"name": "sendContactFormEmail","version": "1.0.0","main": "index.js","license": "MIT","scripts": {"build": "webpack --config webpack.config.js --mode production"},"devDependencies": {"@types/cors": "^2.8.10","@types/ejs": "^3.0.6","@types/express": "^4.17.11","@types/pug": "^2.0.4","dotenv-cli": "^4.0.0","dotenv-webpack": "^7.0.2","express": "^4.17.1","ts-loader": "^8.1.0","ts-node": "^9.1.1","typescript": "^4.2.3","webpack": "^5.30.0","webpack-cli": "^4.6.0","webpack-node-externals": "^2.5.2"},"dependencies": {"axios": "^0.21.1","cors": "^2.8.5","pug": "^3.0.2"}}
Okay, so the coding part is pretty much done. Not so difficult, huh? In the next part I will cover the way I did the infrastructure deployment. See you again pretty soon!
